Leave your contact details and our
consultant will contact you

You can calculate the number of pulses per mm in DrufelCNC.
To do this, you need:
1. Open DrufelCNC.
2. Click on the "Show settings" button in the upper menu of the main window.
3. Go to the "Axes settings" tab.
4. Click the button to calibrate a particular axis. As an example, let's adjust the number of pulses along the X axis.

5. After clicking on the button, a window opens:

6. In the "Move to" field, enter a value for the distance by which you need to move the tool. In our case, let's enter the value 50.

7. In the "Move speed" field, set the speed of movement. In our case, we will enter the value 300. Attention! This speed must be slow! So that you can quickly respond to an emergency and not damage the machine.
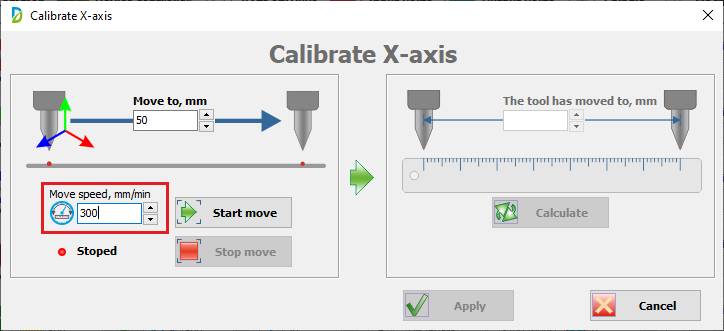
8. Remember the current position of the tool, for example with a marker. Click on the "Start move" button. After pressing the button, movement will begin for the specified segment.
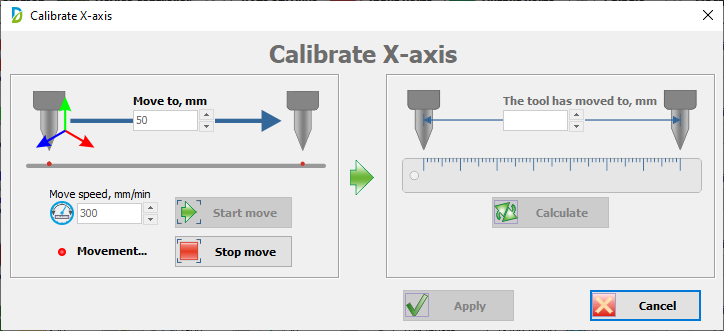
9. After the end of the tool movement, use the ruler to measure the actual distance the tool moved. Enter this value in the "The tool has moved to" field. In our case, this value is 25. Click the "Calculate" button.

10. After pressing, the number of pulses per 1 mm is calculated, which you need to set for the axis to be calibrated. Click the Apply button to apply the calculation results.
11. If you did everything correctly, the updated value will appear in the settings window.

Recommended: